
A Beginner's Guide to Natural Light Food Photography
Why Natural Light Beats Any Kit
Before you spend a penny on softboxes or expensive lenses, spend ten minutes watching how daylight moves through your kitchen. Window light is free, flattering, and endlessly variable — three qualities that make it the best teacher a home cook can have. It renders food honestly: butter looks like butter, herbs look green rather than grey, and the crumb of a scone reads as texture rather than noise.
The trick is not to fight the light, but to position your dish where the light already wants to fall. A single window is enough. Two would be a luxury. Most of the photographs you admire in cookbooks were made within a metre of an ordinary window, with a white board and a bit of patience.
Finding the Right Window
Start by identifying which direction your windows face. In the UK, north-facing windows give the most consistent, soft light all day — the kind that flatters sauces, soups, and anything glossy. South-facing windows are bright and warm but produce hard, contrasty shadows around midday, so you will want to shoot early morning or late afternoon. East and west windows split the difference.
- Distance matters. Position your dish roughly 30–60cm from the glass. Closer than that and the light becomes harsh and uneven; further away and it turns flat and dim.
- Shoot beside the window, not into it. The light should strike your dish from the side or slightly behind, creating gentle shadows that give shape and depth.
- Overcast days are gold. A cloudy sky acts as an enormous diffuser. If the forecast says grey, put the kettle on and get your camera out.
- Avoid direct midday sun in summer. Move the table back or hang a thin white sheet across the window to soften it.
Turn Everyday Objects Into Reflectors
A reflector does one job: it bounces light back into the shadow side of your subject. This is what separates a flat, muddy photograph from one with soft, luminous depth. You almost certainly already own two or three.
- White foam board from an art shop is the classic, and costs very little. It gives a clean, neutral bounce.
- A baking tray lined with foil works in a pinch, though it produces a sharper, more specular light. Scrunch the foil and flatten it again for a softer effect.
- A white chopping board, a tea towel or a sheet of A3 paper all do the job for small dishes.
- A black card does the opposite — it absorbs light. Use it on the bright side of a dish when you want deeper, moodier shadows.
Prop your reflector upright on the shadow side, around 20–30cm away, angled slightly towards the window. Watch the shadow lift as you move it. That moment of "oh, there it is" is the whole craft in miniature.
Styling the Dish for the Light
Food styling and lighting are the same conversation. A few small decisions make a big difference.
- Choose matte plates for bright light and glossy ones for soft light. A shiny white plate in strong sun becomes a mirror and distracts the eye.
- Build height. Pile rather than spread. A mound of pasta or a stacked stack of pancakes catches the light in layers.
- Leave one side quieter. Don't fill every corner. Negative space is what makes a plate look generous rather than cluttered.
- Refresh the surface. A brush of oil on a roasted vegetable, a spritz of water on salad leaves, or a light dusting of icing sugar brings life back to food that has sat for ten minutes.
- Style the edges of the frame too. A crumpled linen napkin, a scattering of flaky salt, a half-cut lemon — these read as texture and give the eye somewhere to rest.
Camera Settings and Simple Habits
You do not need a manual mode to make this work, but a few habits help whether you are using a phone or a camera.
- Turn off the flash. Always. It flattens everything and creates ugly specular hotspots.
- Tap to focus on the food, not the background. On a phone, tap the point of interest and drag the exposure slider down slightly — a touch darker often looks richer.
- Get low or get level. A camera at plate height feels intimate. A slightly raised angle (about 45 degrees) is the workhorse for most dishes. Straight overhead suits flat lay compositions like pizzas or trays of brownies.
- Steady yourself. Rest your elbows on the table, or brace the phone against a stack of books.
- Take more frames than you think you need. Move the reflector, shift the plate a few centimetres, and shoot again.
Timing, Troubleshooting and the Long Game
Light changes fast — much faster than most people expect. A window that is perfect at 10am may be dull by 11.30. Work in short, focused bursts and don't chase it all day.
If your shadows look too hard, move the dish further from the window or add a second reflector on the opposite side. If everything looks grey and lifeless, your dish is probably too far from the glass. If colours look strangely blue, you are shooting in shade — try a slightly warmer white balance setting, or simply move into the light.
Keep a small notebook or phone note of what worked and when. Within a fortnight you will know exactly which corner of your kitchen is best at which hour, and you will stop thinking about lighting altogether. That is when the real pleasure begins: cooking something lovely, setting it down, and capturing it exactly as it tasted.
tag: Photography

Amelia Clarke Author
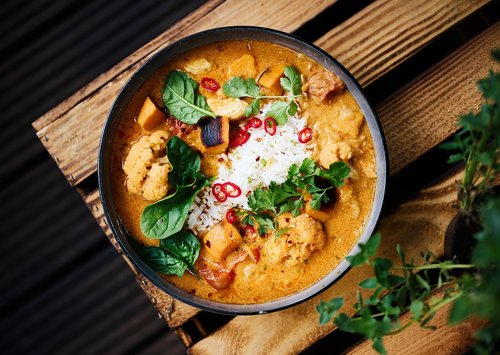
Plan meals around asparagus, courgettes, root vegetables, and leafy greens to enjoy fresher produce and better value at markets.
YOU MAY ALSO LIKE
Cooking with Seasonal British Vegetables Through the Year
Sep 10
10Keep your starter active with regular feeding, consistent temperatures, and careful observation of bubbles, smell, and rise before baking.
read more
Mastering the Art of Sourdough Starter Maintenance
Sep 4
10Build depth by sweating aromatics, toasting spices, and adding stock gradually before blending for a smooth finish at the end.
read moreFood Styling
-

ERRIC CATONA
Layer cake stands with finger sandwiches, scones, and small pastries to create a welcoming table that encourages guests to linger.
May 19, 2016 at 5.12 pm
Reply
ERRIC CATONA
Choose linen, wood, and neutral ceramics to highlight crust, crumb, and shape without distracting from the bake itself.
May 19, 2016 at 5.12 pm
Reply -
ERRIC CATONA
Add sea salt, citrus zest, or herbs to cakes and biscuits so sweetness feels rounded rather than cloying.
May 19, 2016 at 5.12 pm
Reply
Recipe Design
Your email address will not be published.